CPQ Workflow
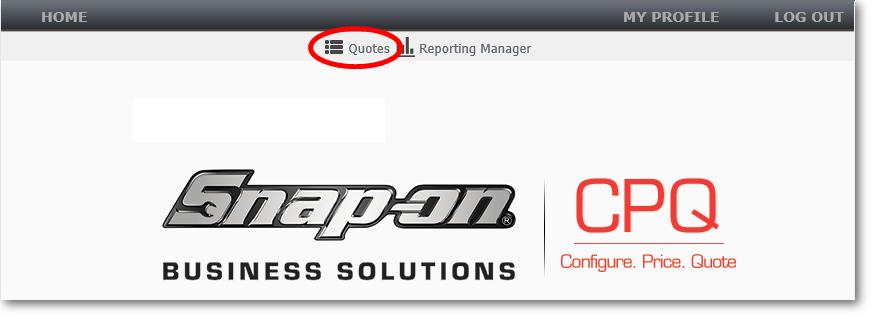
- Click Quotes to begin.
 Show me...
- Start a New Transaction. Show me...
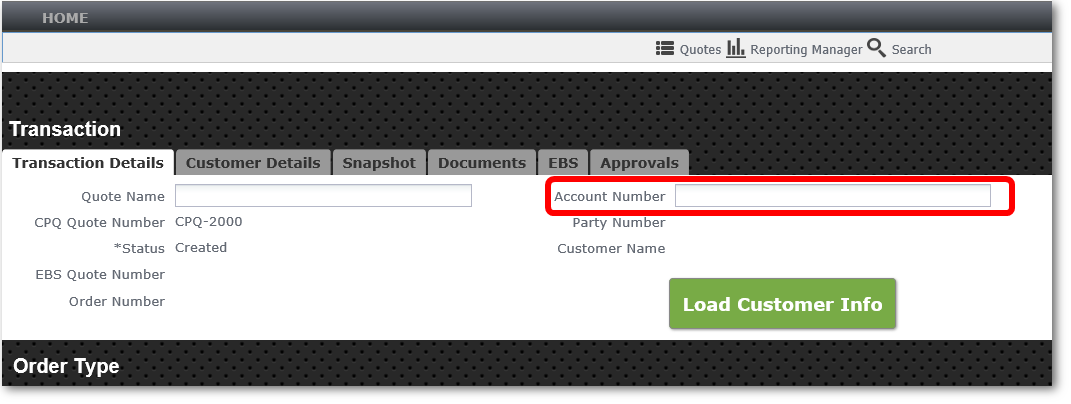
- Enter the Account Number. Show me...
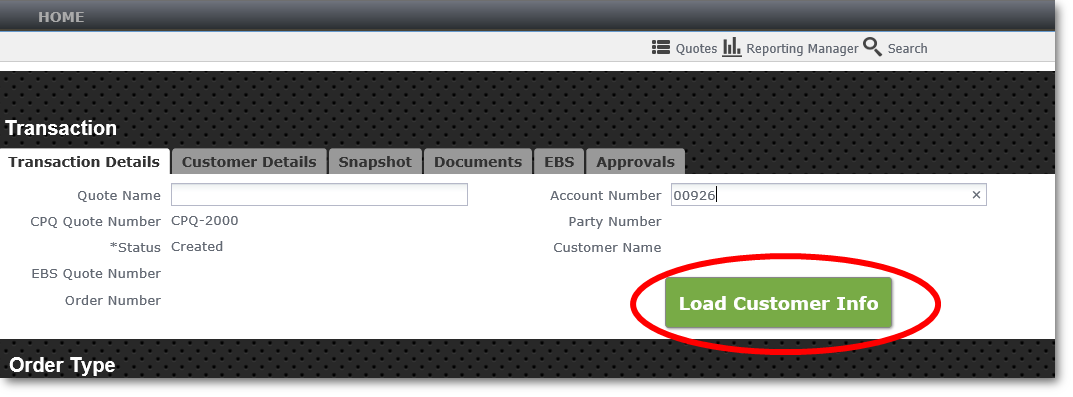
- Load Customer Info. Show me...
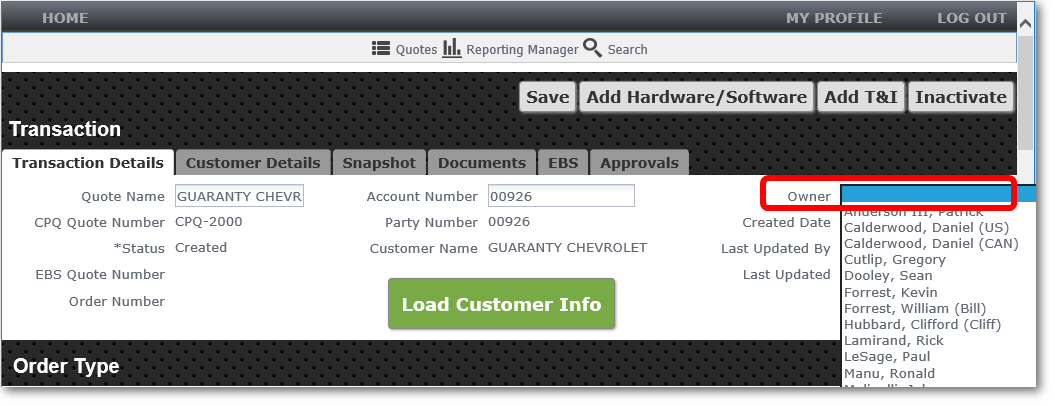
- Choose sales rep (Owner). Show me...
- Choose Quote Type. Show me...

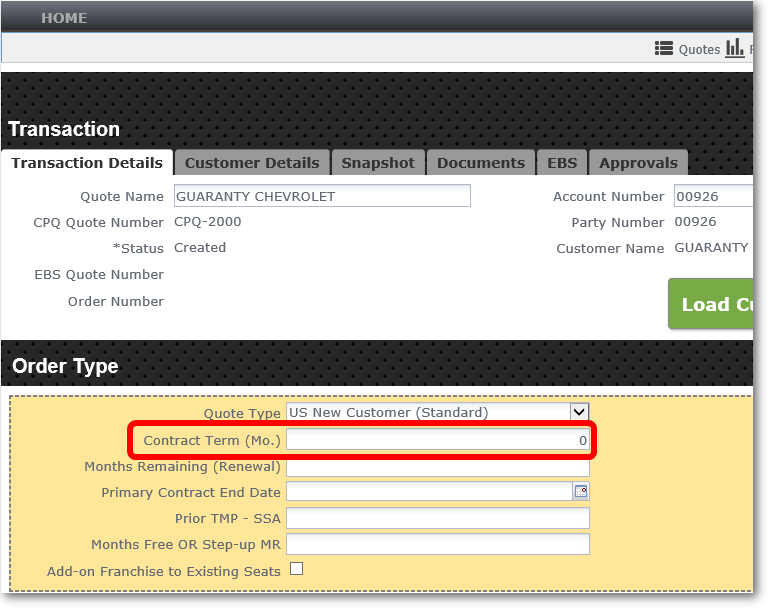
- Enter Contract Term in months. Show me...
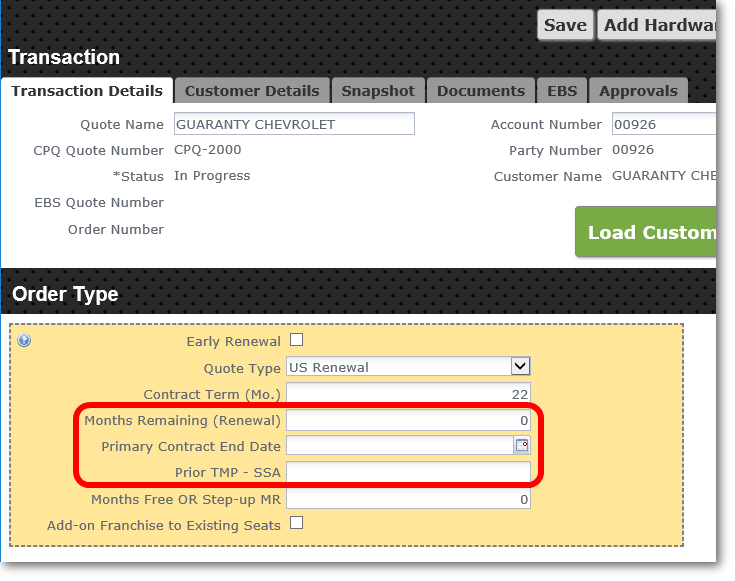
- If renewal: enter Months Remaining, Primary Contract End Date and Prior TMP - SSA. Show me...
- Enter Months Free, if any.
- If this is adding on a franchise to existing seats, check the box.
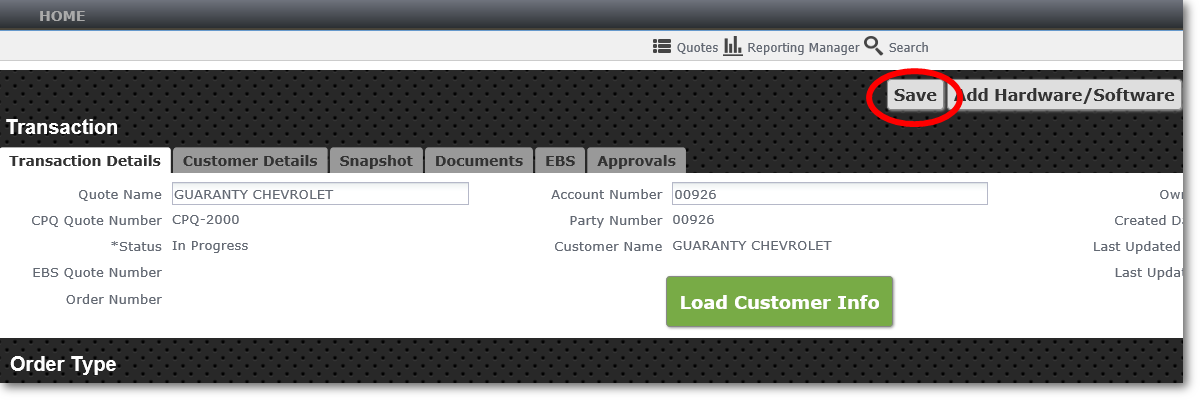
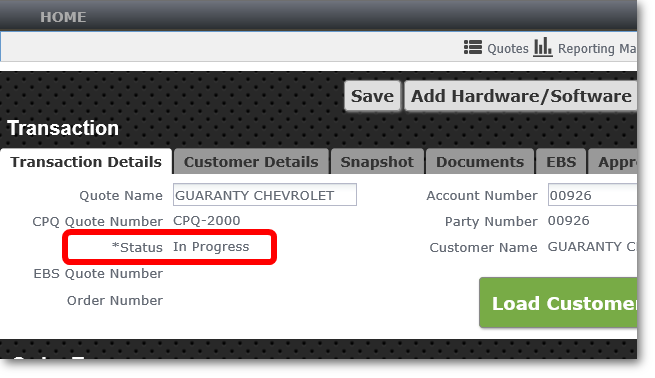
- Save the transaction. Show me...
Tip: If you choose any of the "Renewal" options for Quote Type in step 6, you can't save your quote until you enter the number of months remaining. In CPQ, scroll down to the Pricing section and find Months Remaining (Renewal) at the top right of that section. Enter a number and then you can click Save.
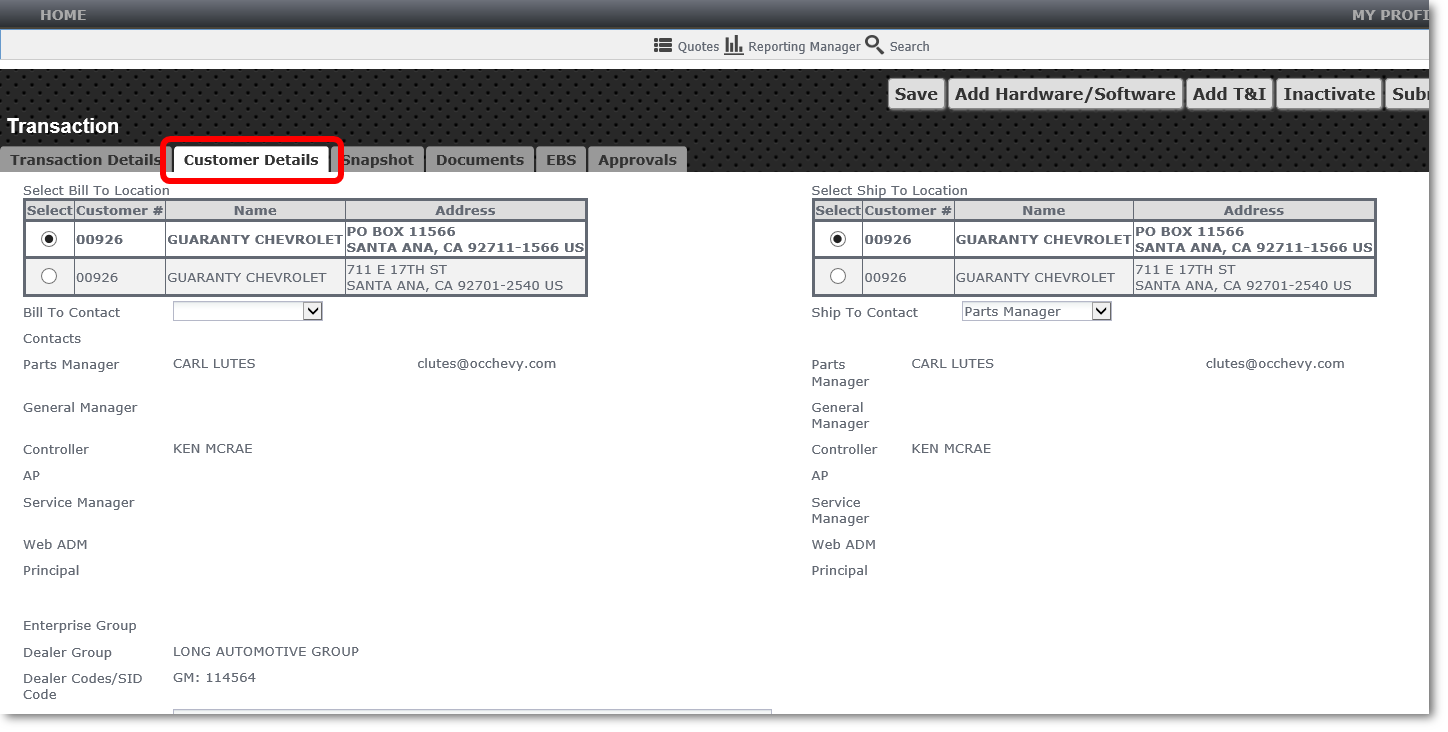
- Check Customer Details. Show me...
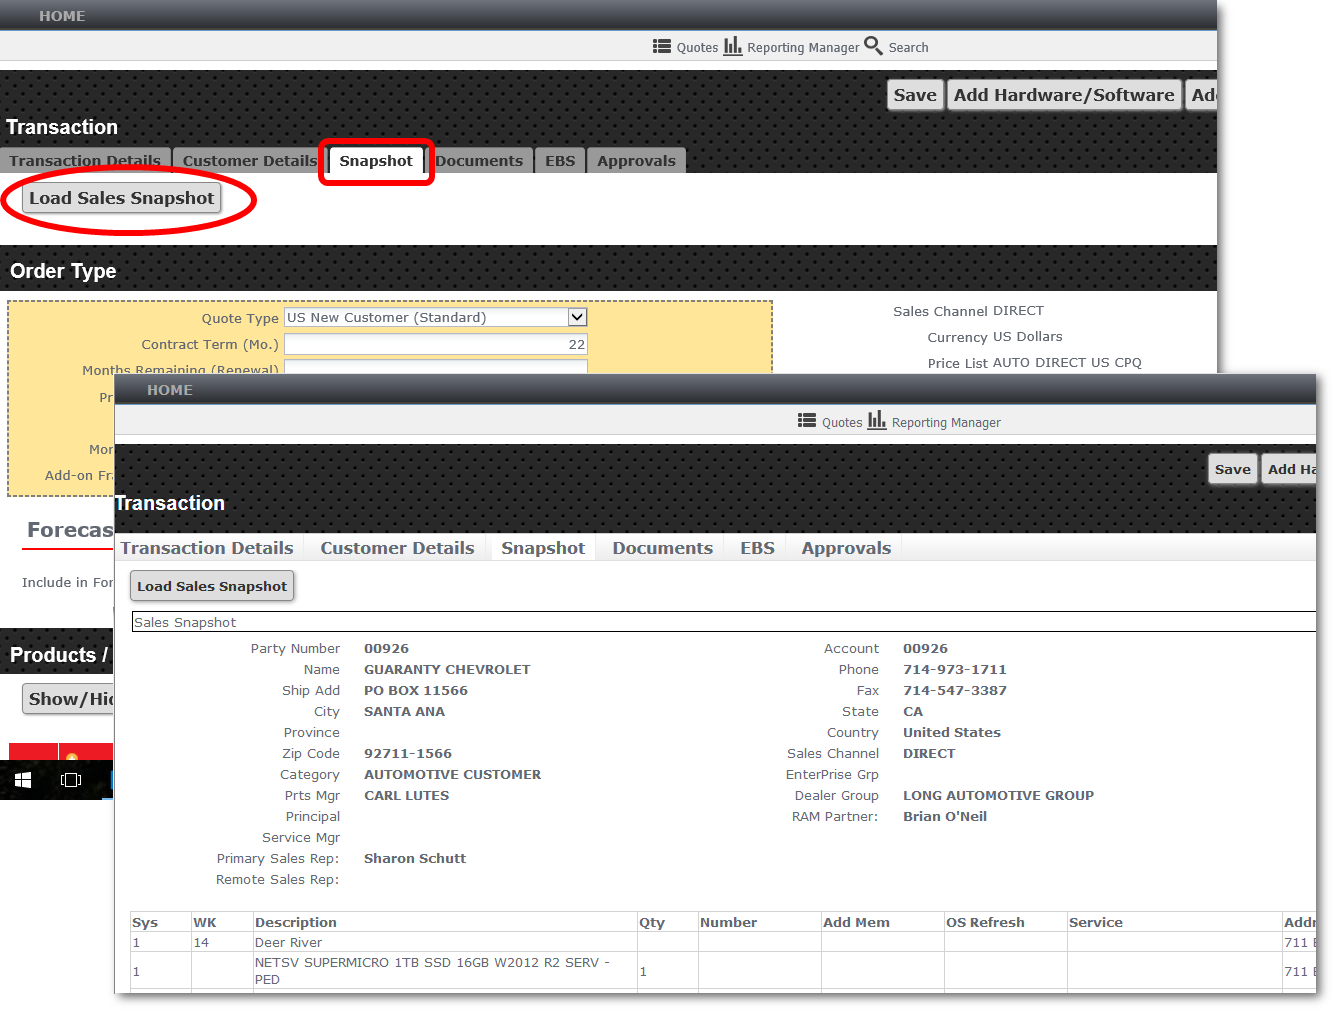
- Check Snapshot. Show me...
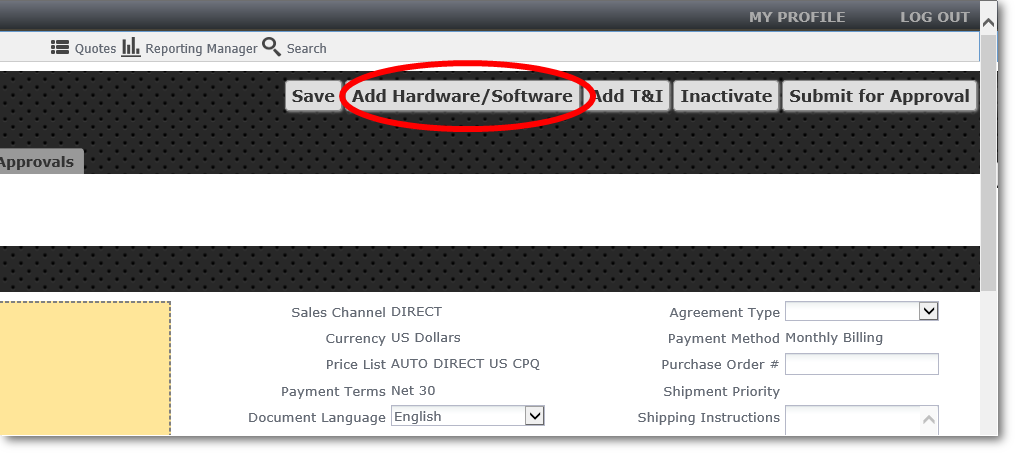
- Add Hardware/Software. Show me...
Note: Once you select an EPC, choose USB or DVD from the menu that appears just below the EPC thumbnails and enter a quantity.
Note: If they want USB updates and multiple duplicate systems, do not include the USB update in this step. Instead, after adding hardware/software to the transaction, click Add Hardware/Software again and add the USB updates separately. Then when you copy the system it won't unnecessarily copy the USB as well.
Note: Once you select an EPC, be sure to select the DMS provider from the Integration section, located just below the Software section of the page.
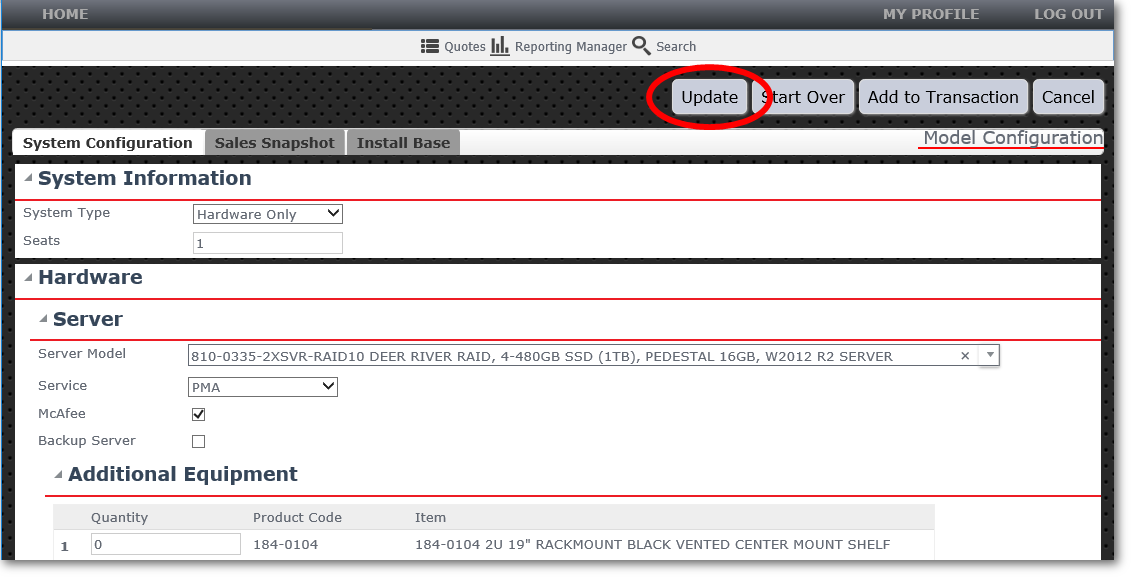
- Customize the order for whatever they need and Update. Show me...
- Add to Transaction. Show me...
- Copy system, if needed. Show me...
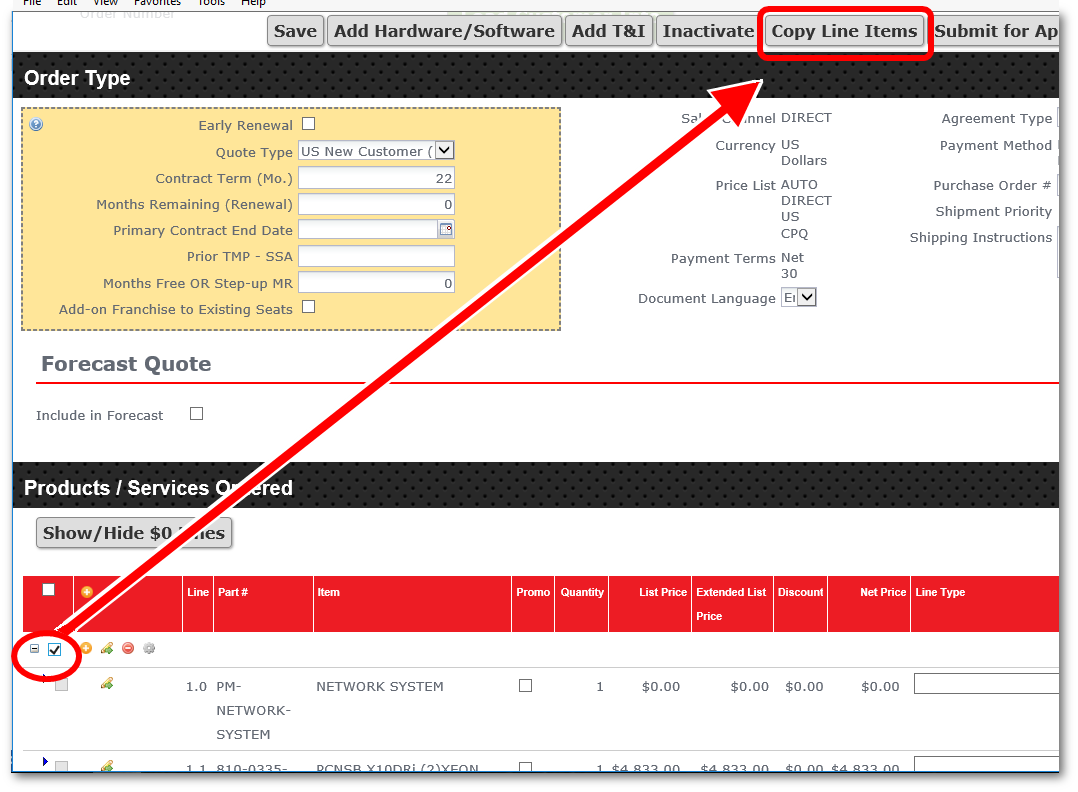
- Check the box next to system you want to copy
- Click Copy Line Items button
- Enter number of copies, click Copy
- Make any other adjustments
- Save the transaction again. Show me...
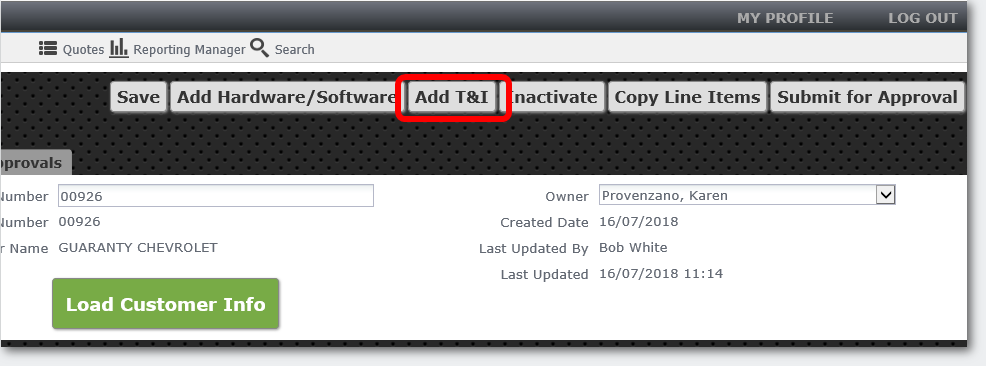
- Add T&I (if not Mitchell1). Show me...
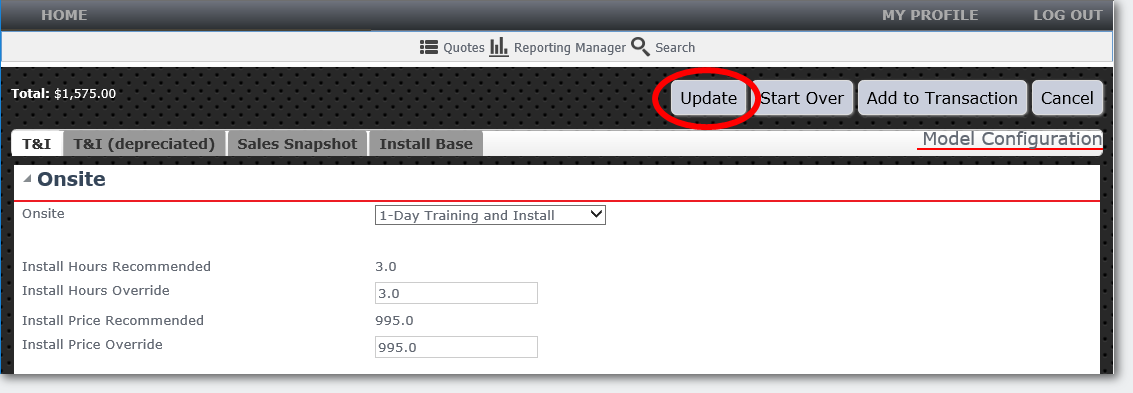
- Make any custom T&I entries and Update again.Show me...
- Add to Transaction. Show me...
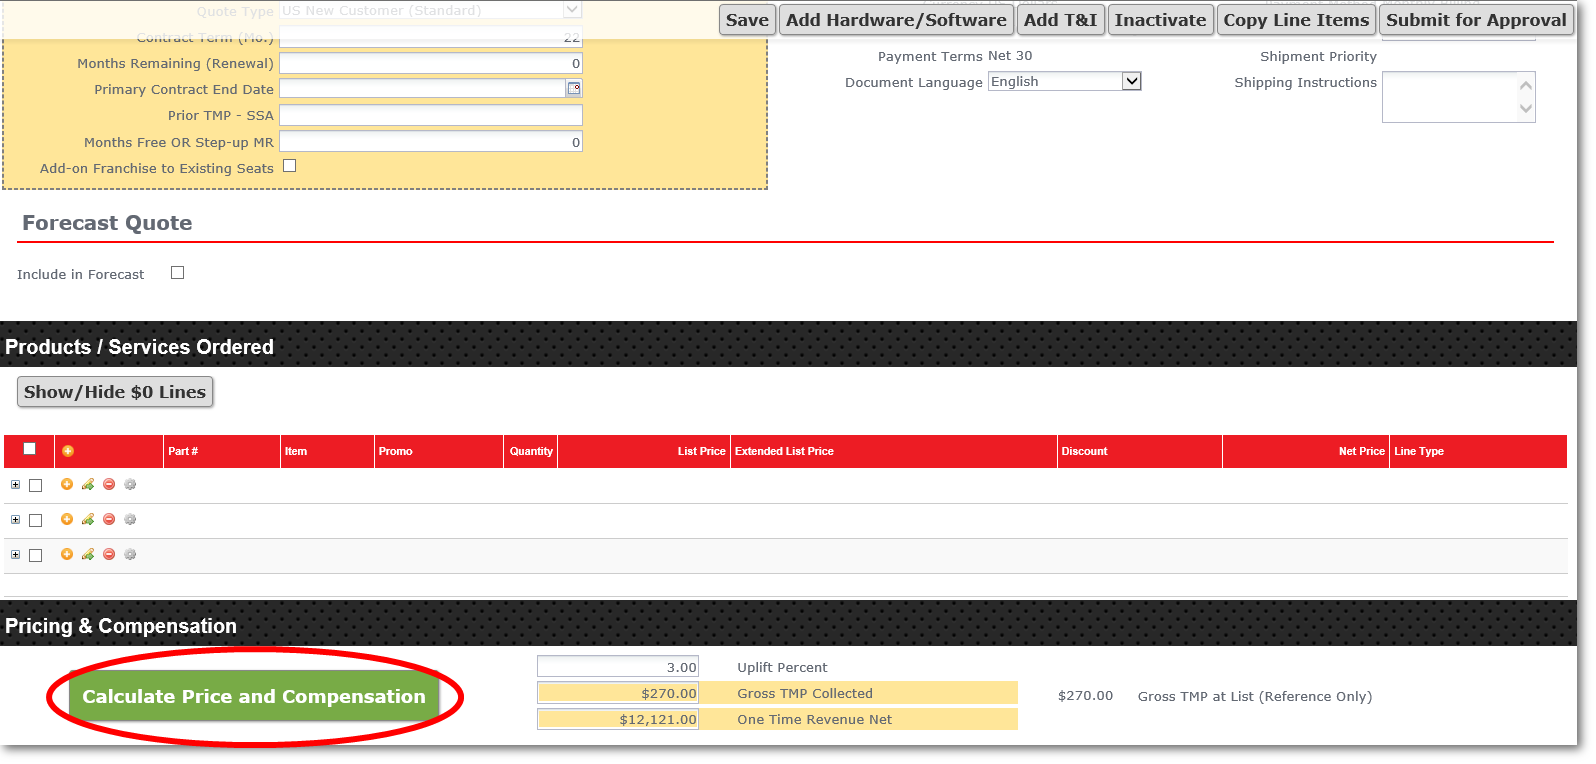
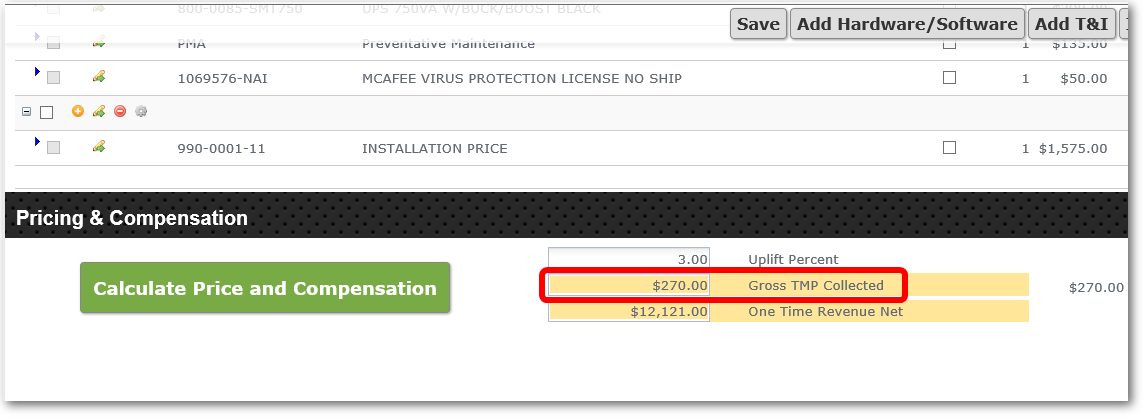
- Calculate Price and Compensation (scroll to bottom of screen). Show me...
- Adjust Gross TMP Collected. Show me...
- Adjust Financed by SBS if necessary. Note: these fields will autopopulate. Show me...
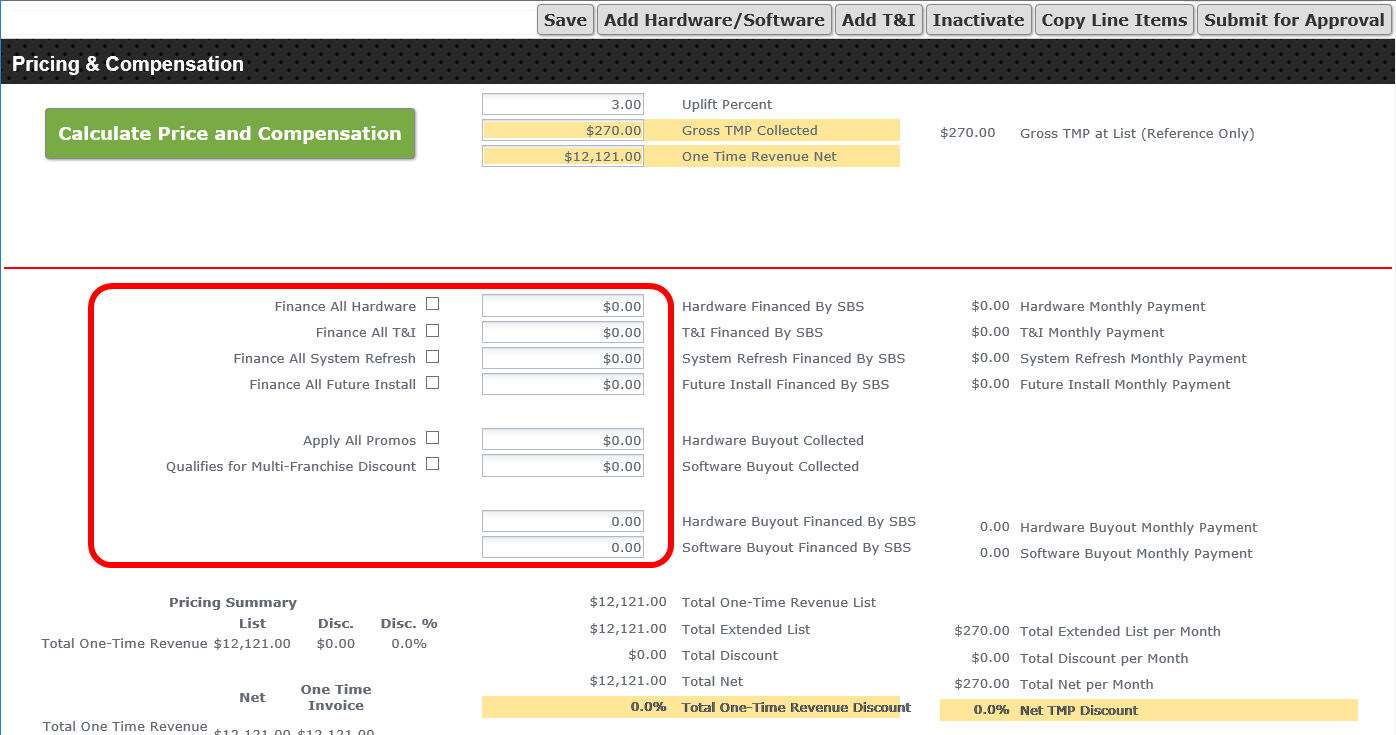
- Calculate Price and Compensation again.
Note: Once you calculate compensation, select the Documents tab to continue.
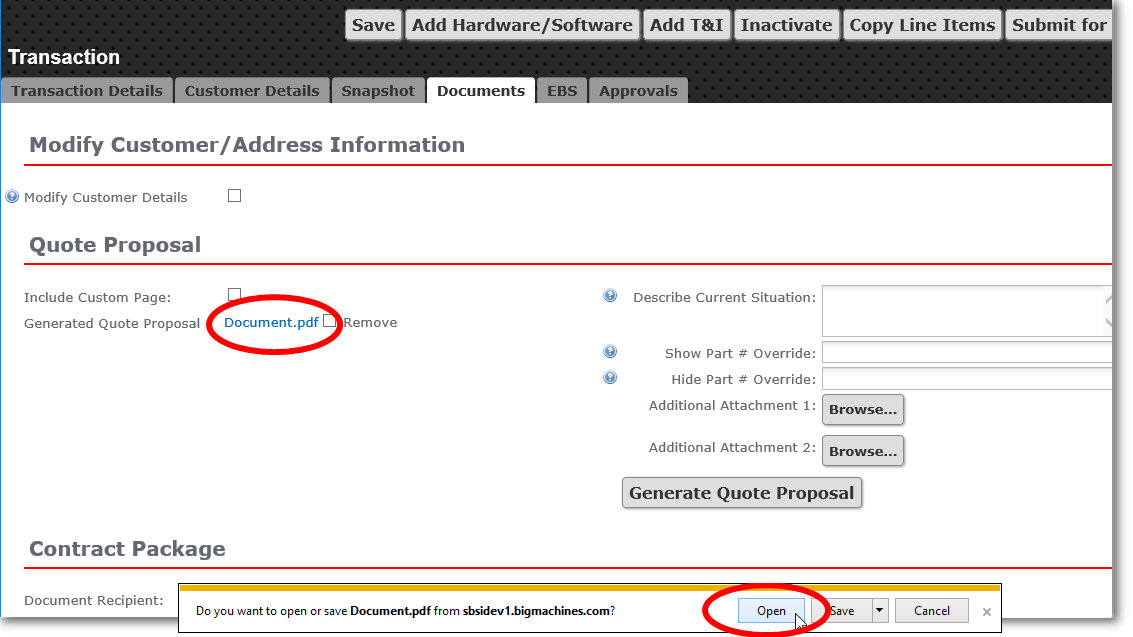
- Add any customization to the Quote Proposal section and then Generate Quote Proposal document. Show me...

- Review the quote proposal for accuracy: click the Document.pdf link, Open the Quote Proposal to view the PDF. Show me...
- Save again.
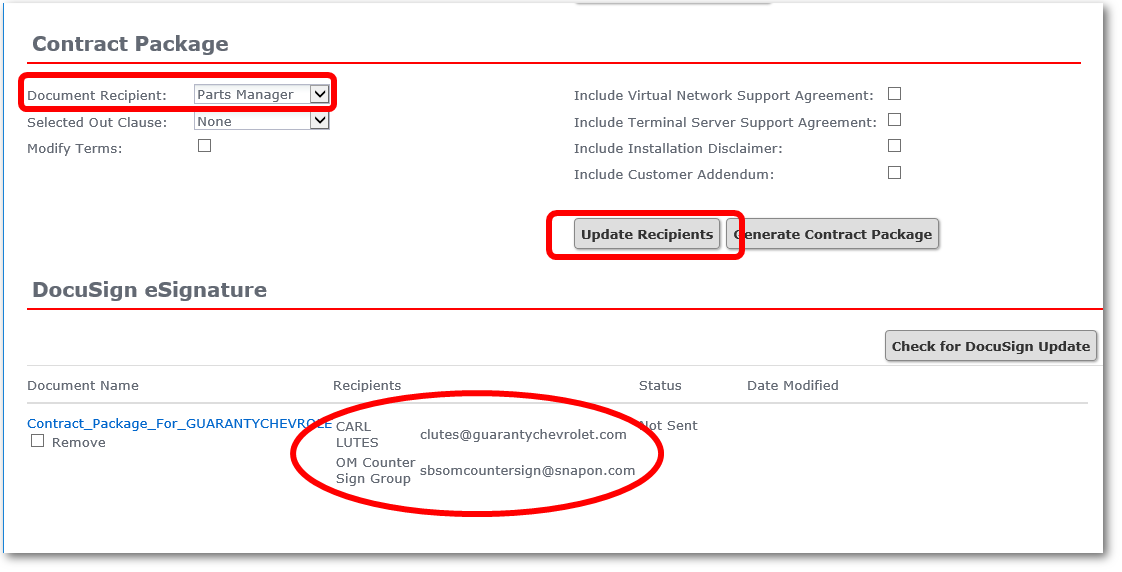
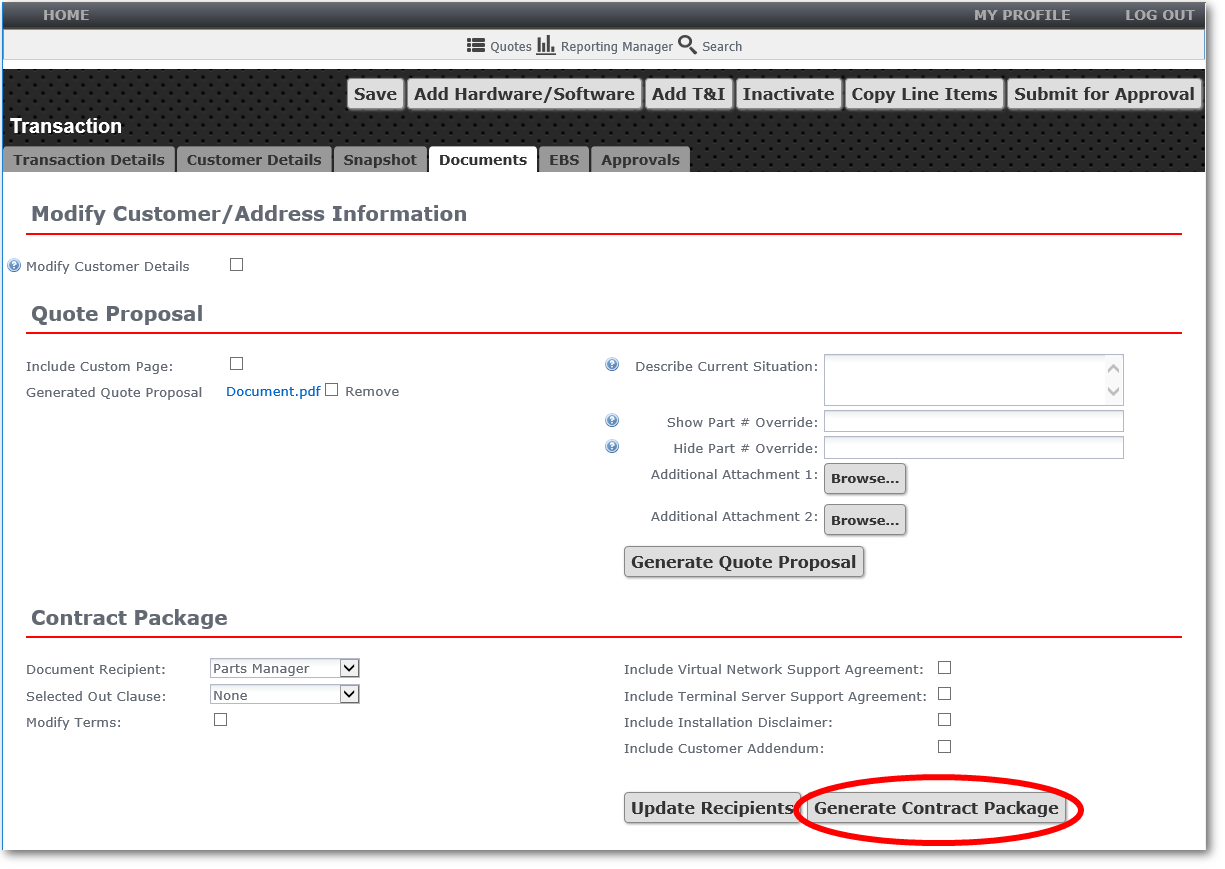
- Customize the Contract Package section of the Documents tab, making sure to select a Document Recipient. Make sure the contact info in the DocuSign eSignature section underneath it is correct. If not, click Update Recipients. Show me...
- Generate Contract Package document.Show me...
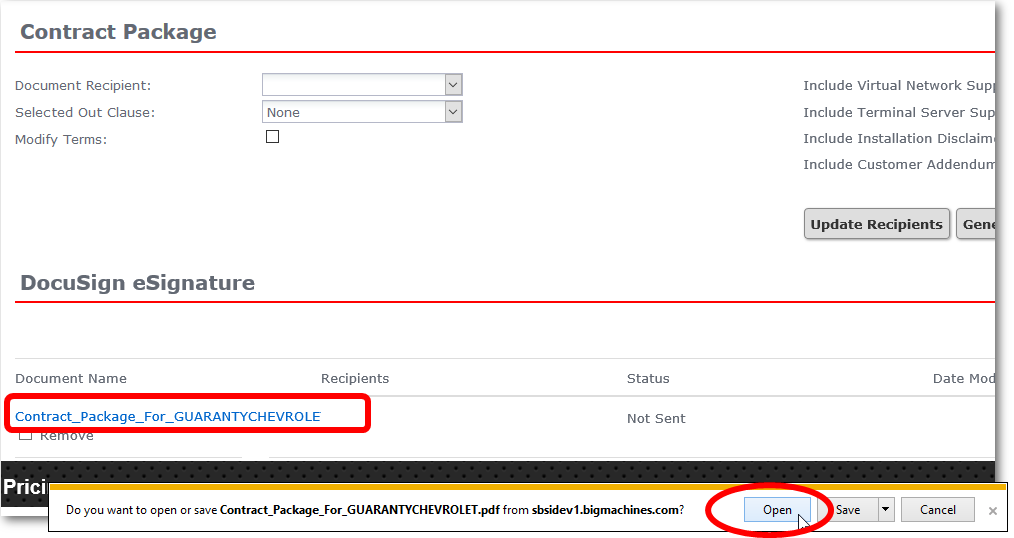
- Review the contract package for accuracy: Click the Contract_Package_for... link, Open the contract package to view it as a PDF. Show me...
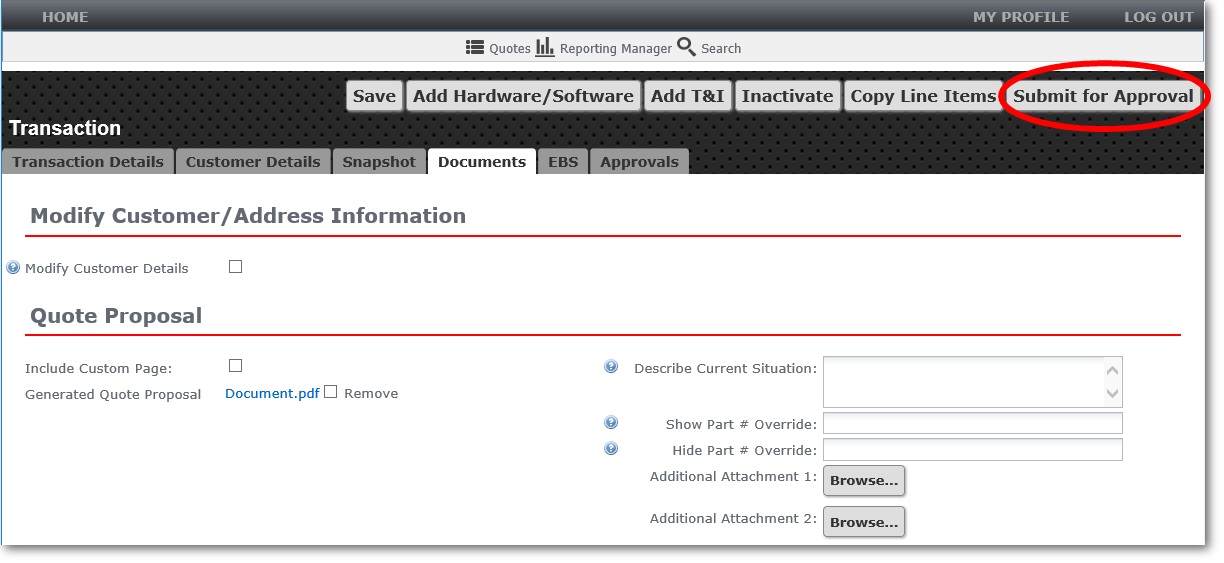
- Submit for Approval. Show me...
Note: In most cases, approval will be instantaneous. However, you may have to wait.
-
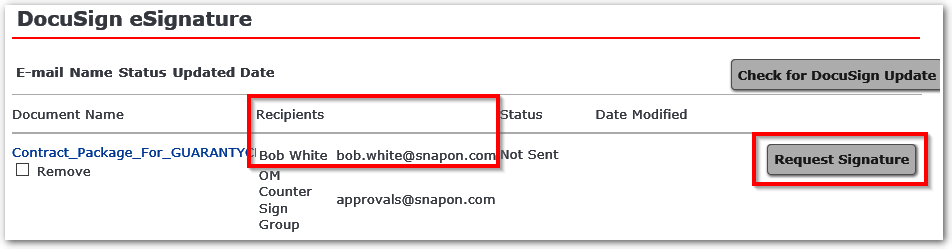
When the contract package has been approved, send it to the customer for a signature. Verify that the recipient is correct, then click the Request Signature button to send it.
Show me... - Wait for customer signature: Transaction Details tab will show "Signed" in the Status field when the customer has signed the contract. Show me...
IMPORTANT: If the customer wants changes to the Terms and Conditions, click here for instructions on editing them in CPQ and resubmitting for approval.
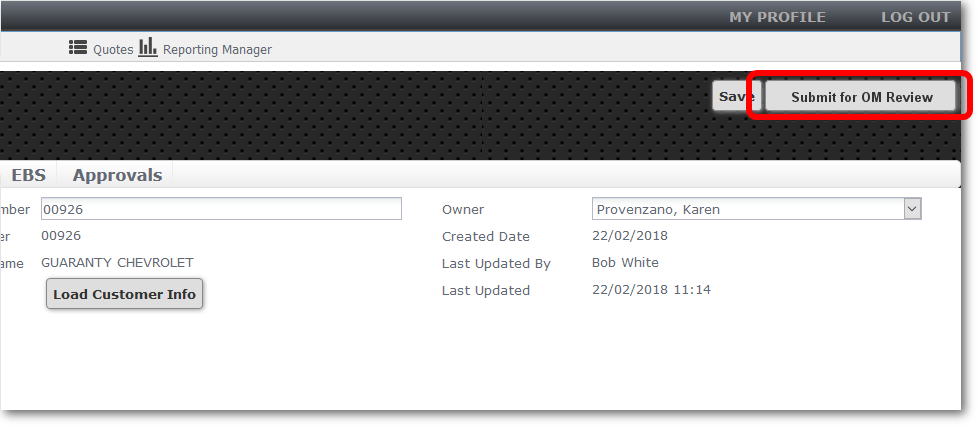
- Submit for Order Management Review. Show me...